
Table of Contents
How to Upload and Set Up a Custom Extension in Incogniton
Before you begin, ensure the Custom Extension file you want to upload is saved on your computer and in .crx format.
- Step 1: Launch Incogniton.
- Step 2: Navigate to Browser Management on the Home screen sidebar. This takes you to the dashboard where you can manage your browser profiles and extensions.
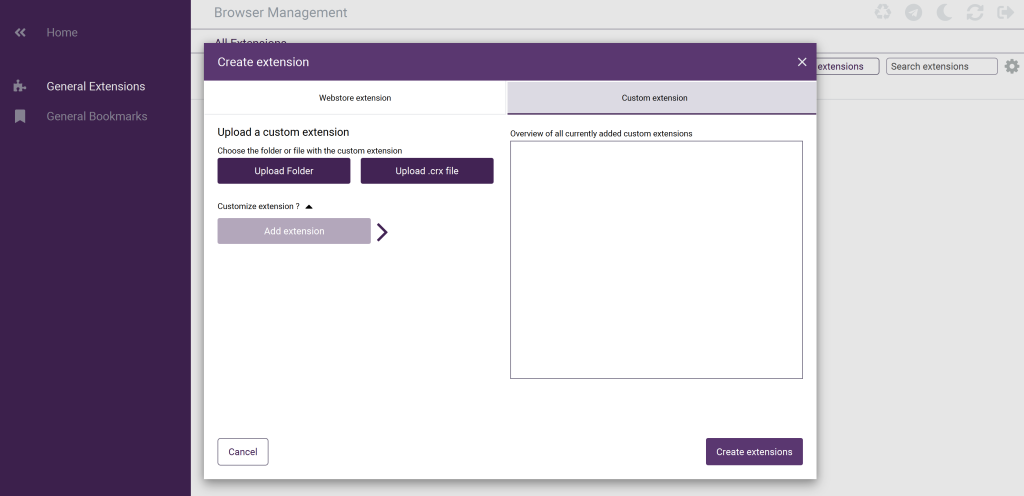
- Step 3: In the top menu, click the Create Extensions button, then select Custom Extension in the pop-up dialog. This opens the file explorer.
- Step 4: Click the Upload .crx File.
- Step 5: Select your .crx file from your computer and follow the prompts to add it.
- Step 6: [This is optional] Click on the “Customize Extension?” arrow to add a special name and description for the extension.
- Step 7: Click the arrow next to “Add to Extension”.
- Step 8: Click “Create Extensions” to finalize the process.
Once you’ve completed the steps, your extension will show up in the General Extensions menu.
How to Assign Custom Extensions to Browser Profiles
If you want to add a custom extension to one or more browser profiles, take the following steps:
- Step 1: Click on Create Single in the sidebar menu on the home page to create a new browser profile.
- Step 2: Go to Extensions and then Custom Extension.
- Step 3: Click on the extension in the general list you want to add to the profile.
- Step 4: Click on Add selected and then Create profile to add the custom extension.
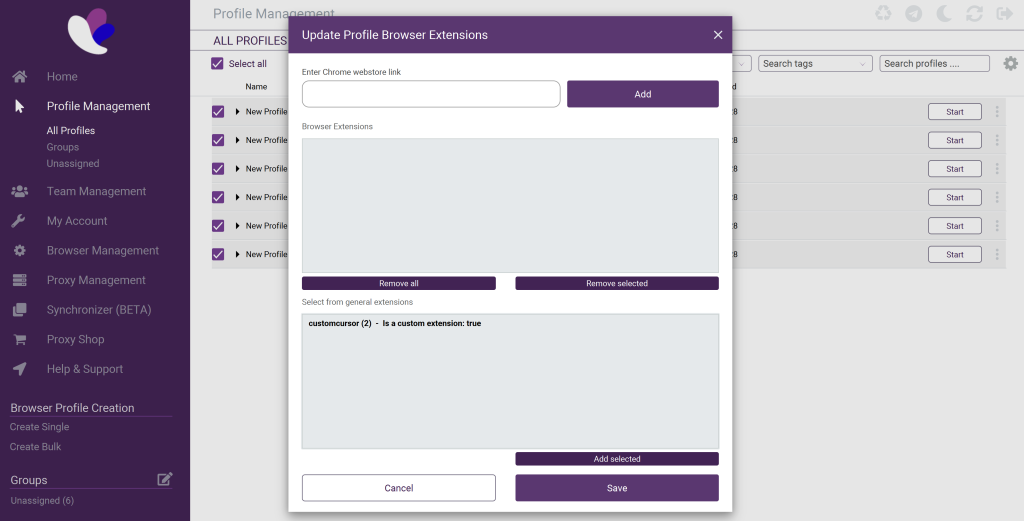
Do you want to add the custom extension in bulk to multiple profiles at once? Then, go to Profile Management, select the profiles you want to add the extension to and click on Action – Modify – Set browser extensions. Next, select the custom extension, click on Add selected and then on Save.
Need Help?
If you have any questions about the process or running into issues assigning extensions, feel free to reach out to Incogniton Support for assistance.


